Good Morning! How are you on this summer morning?
It is with all vulnerability that I share this post.
Many of you will think that I've lost my mind.
Rebekah has dubbed this the "Watering Hole."

Before I get to the meat of this post, I'll tell you that I flunked beginning swimming 4 years in a row.
The life guards at my aunt's country club finally decided that I could dog paddle to save myself but I just could not swim. Essentially, they gave up on me! I don't know why but I could never turn my head to take a breath. I always ended up with a mouth full of water.
Coordinated is not my middle name.

I like floating not swimming.
The past few Texas summers have tested this Yankee's patience.
They are endlessly long and hot. I love my husband and didn't want to leave him but I was afraid I was going to have to head for cooling climates during the summer.
This year I was convinced that there had to be a way for me to cool off beside sitting sequestered in the air con.
We researched pools and spas. A spa wasn't really what I was after because I was trying to cool down not sit in hot water.
Hello? Hot Flashes!
We have always held off on a pool because I really don't think our yard is able to handle one.
There is literally, not one level spot in our back yard.
I had to stick a paver under the birdbath.


Bill had to go to supreme lengths to even level the kid's swing set.
There is also a huge power line running to the attractive green box that sits in the corner of my yard.
I almost picked up a Intex pool at Walmart one day but
Bill really didn't think he would like the look of that big blue thing in our back yard.
I seriously didn't think that it would work for only $89.00.
I did what I always do since the dawn of Pinterest.
You can see my Keep Cool board here.
Red Neck Pools and Hot Tubs also garnered some interesting results.
Check it out on Pinterest.
It is with all vulnerability that I share this post.
Many of you will think that I've lost my mind.
Rebekah has dubbed this the "Watering Hole."


Before I get to the meat of this post, I'll tell you that I flunked beginning swimming 4 years in a row.
The life guards at my aunt's country club finally decided that I could dog paddle to save myself but I just could not swim. Essentially, they gave up on me! I don't know why but I could never turn my head to take a breath. I always ended up with a mouth full of water.
Coordinated is not my middle name.

I like floating not swimming.
The past few Texas summers have tested this Yankee's patience.
They are endlessly long and hot. I love my husband and didn't want to leave him but I was afraid I was going to have to head for cooling climates during the summer.
This year I was convinced that there had to be a way for me to cool off beside sitting sequestered in the air con.
We researched pools and spas. A spa wasn't really what I was after because I was trying to cool down not sit in hot water.
Hello? Hot Flashes!
We have always held off on a pool because I really don't think our yard is able to handle one.
There is literally, not one level spot in our back yard.
I had to stick a paver under the birdbath.


Bill had to go to supreme lengths to even level the kid's swing set.
There is also a huge power line running to the attractive green box that sits in the corner of my yard.
I almost picked up a Intex pool at Walmart one day but
Bill really didn't think he would like the look of that big blue thing in our back yard.
I seriously didn't think that it would work for only $89.00.
I did what I always do since the dawn of Pinterest.
You can see my Keep Cool board here.
Red Neck Pools and Hot Tubs also garnered some interesting results.
Check it out on Pinterest.
I threw out the stock tank idea to Bill. He didn't say much but he humored me and we headed to Tractor Supply.
They had some pretty good options.
They had galvanized but also they also had Rubbermaid.
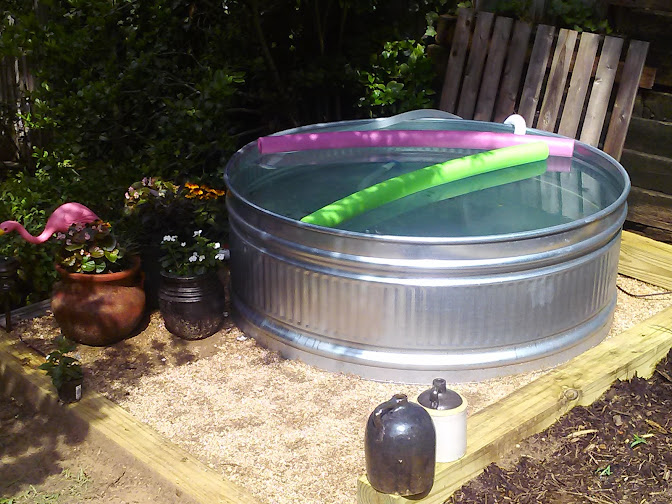
We found a six by two round galvanized tank for $249.00.
We tied it to my pick up.

I told Bill to park around the corner until night fall and then we could unload it during the cover of darkness.
Instead he pulled right up in front of our suburban house and we rolled it around the back.
I don't think any of the neighbors could see us, (at least I hope they couldn't.)
Our yard guy leveled a portion of the yard and put in these timbers.

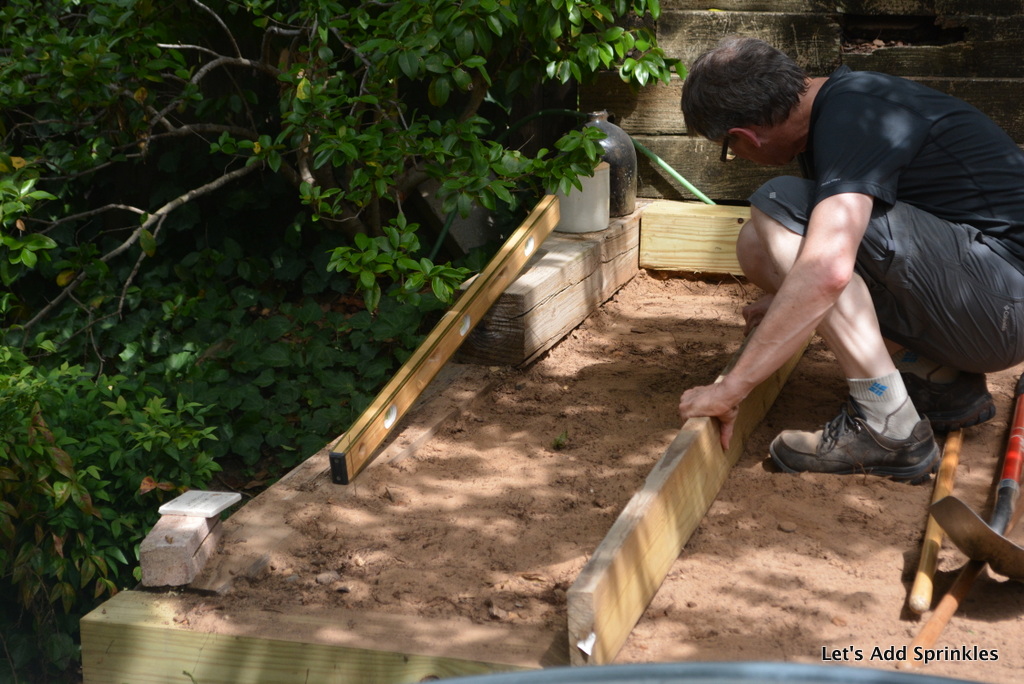

We spread a layer of decomposed granite on top of the newly leveled ground.
The people at the pool store didn't act like we were crazy when we told them what we were doing. They helped us pick out a pump and told us to come back and they would test our water. It turns out that our water is so highly chlorinated that we didn't need to add chlorine. Hmmm. That's not good. Is it?

I can't believe we did this.
Really CANNOT believe.
It has become our new standard for the nutty around here.
Bill likes to ask,
"Is it as crazy as a stock tank in the back yard?"
Hmmm.
No.

North Texans can thank me.
As soon as we filled up the pool it started raining and it rained off and on all week.
We are still 9 inches below normal but last week certainly helped.

Here is that corner of the yard before:

Here it is now:

This just makes me happy.

Our next project will be a floating deck for the chairs. I'd like to attempt this one myself but we will see...
Yesterday I floated and puttered in the yard. It was fabulous being able to work in the yard and not feel like I was going to self combust. I took a break or two and cooled off and admired my handiwork.
I'll come back with more views from my pool and a cost break down.
I believe we are all in this for under $700.00.
Keep cool,
Katie
Linking with,
A Stroll Thru Life
Coastal Charm
My Uncommon Slice of Suburbia
A Return to Loveliness
Savvy Southern Style
French Country Cottage
Funky Junk Interiors