
The first owner did a pretty good job when she picked out finishes for this house.


I didn't care for her wallpaper selections but those weren't too difficult to change.
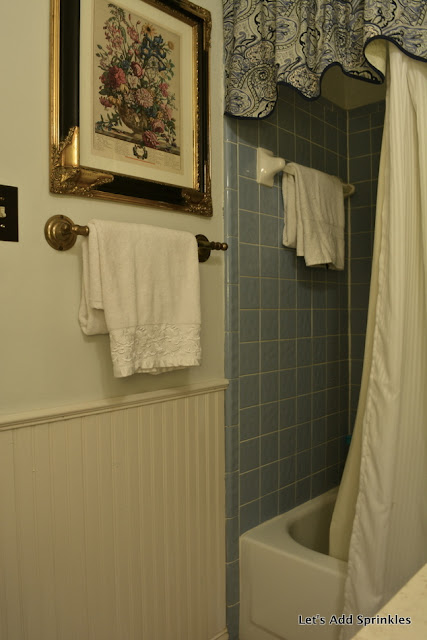
The blue tile in the powder room was another story.


The color was in still in style when the house was built in 1990 but it wasn't what I would have chosen. She chose white for our bathroom. I wish she had chosen white for this shower too.
I believe in choosing neutrals for surfaces that are difficult and costly to change.
I believe that color can and should be used on walls which are easy to change.


I'd had country blue in our first house in 1983 but by the time we bought this house in 1993, I was over it.
An Art Deco inspired wallpaper with the blue tile was pretty cute so I went with it for about five years.

In 1998 my brother's new fiance was coming to visit so I stripped the wallpaper and painted the walls gold.
This was a cute scheme that coordinated with my bright brass faucets.
After our big flood in 2005, I painted the walls blue then glazed them with a bronze color.

I added a brown shower curtain and brown accents but I was so sick of the bright brass fixtures.
I cannot understand how they are in style again so soon.
Three years ago, I got some blue and white valances and decided to embrace the blue.
I added a brown shower curtain and brown accents but I was so sick of the bright brass fixtures.
I cannot understand how they are in style again so soon.


Two years ago Bill gave me the okay to rehab this shower but he started traveling for work so I put the project on hold.
I couldn't deal with that stress during an already stressful time.
Our friends from Beaumont had the Miracle Method done to both of the their mid-century bathrooms.
I'd looked in to that but decided to research some DIY tile transformation kits.

Rust-Oleum had a new DIY method that I wanted to try.
I'd looked in to that but decided to research some DIY tile transformation kits.

Rust-Oleum had a new DIY method that I wanted to try.
I'd searched for this product before but it had been pulled from the market.
I found the new version on eBay.
The kit plus the supplies cost less than 75 dollars.
It got to me in three days.
I found the new version on eBay.
The kit plus the supplies cost less than 75 dollars.
It got to me in three days.
It took three days for me to prep the space.

I painted the tile yesterday.
The transformation is amazing.
This product is amazing.
It looks and feel like tile.

I painted the tile yesterday.
The transformation is amazing.
This product is amazing.
It looks and feel like tile.

It looks like I need to brighten the trim with a truer white.
Does it ever end?


It has to cure for three days and then it needs to be caulked.


Come back for a full tutorial and more photos.
Katie
A Stroll Thru Life
French Country Cottage
Cedar Hill Farmhouse
Ms. Toody Goo Shoes
My Uncommon Slice of Suburbia
Funky Junk Interiors
From My Front Porch to Yours
Essence of HomeBetween Naps on the Porch
Hi Katie, I am so excited that I found your post. I have been wanting to do this for the last year. We bought our home a year and a half ago and the realtor said that we would never get the tub clean and would have to replace it. I loved the old tub and it took be about three weeks of scrubbing, but I saved it. The damage before and the cleaners that I used left it with a dull surface. My problem is that this small cottage only has one bathroom so the preparing time and the curing time is going to be a huge problem. We've talked about adding another bathroom and that would be nice, but we have already spent and bundle on all of the necessary improvements. This poor neglected home needed electric, plumbing, roof . . . etc. We bought a money pit, but we love it :)
ReplyDeleteI'll be back . . . I'm looking forward to your step by step tutorial. What you did looks wonderful. I would never know that those were not new tiles :)
Have a lovely week.
Your blogging sister,
Connie :)
Katie, you did a fabulous job! My daughter had her 1930's bathroom done...all tile, professionally about 10 years ago and it was amazing. you'll have so much more fun decorating, now!
ReplyDeleteLooks great. I'm looking forward to seeing how you did it as I have kitchen tile that I've been thinking about painting in some fashion. thanks for the inspiration.
ReplyDeleteI love the transformations! I've never heard of this technique before, so thanks for sharing.
ReplyDeleteHugs,
Noreen
Amazing! I've thought about covering our beige tile with that system, but I'm not sure how well the previous owners installed the tiles, so I could be opening a can of worms. The white is going to allow you to change your accessories any time you want. Great idea!
ReplyDeleteHi Katie,
ReplyDeleteWe used this product on our pink tiles in our main shower. It works like a dream. You do have to be patient with letting it cure. I know they suggested 3 days but after we caulked we did not use the shower for another 3 days so 6 all together. The longer it cures the less likely to have issues. We did our bath tiles 3 years ago and they still sparkle and look great. It is a great product.
Have a great week.
Kris
Good to know! Thanks, Kris.
DeleteWhat a great transformation for pennies on the dollar! Looks so much better!
ReplyDelete